Showing posts with label DIY. Show all posts

Monday, August 13, 2012

DIY Glitter Booties!

Hi y'all! Happy Monday! Right now I'm in Spokane enjoying some quality time with my man {more on that later} and apartment searching. I'm meeting with the college that I'll be at for this year later today too! I managed to slip away and write up this tutorial for the glitter booties I wore last week here. Ready?! :)

I picked up these Steve Madden ankle booties at my local Ross for about $14... such a steal! I loved how these had the lining in the back, perfect for glitter-ing out. 
Options here|here|here|here|here- all options under $50. 

Make sure you're working on a surface that you can throw away/recycle. Unless you want to clean up all that excess glitter.... have fun with that ;) 

I didn't take a picture of the 'supplies' needed because besides the booties, it's only two: permanent fabric glue and glitter of your choice. I picked these up at my local Wal Mart, so no worries with finding anything. Make sure it's permanent glue though! I started out with rubbing small sections onto the desired area. You don't want it to dry and have awkward clumps. Once you get the hang of it you can apply glue to bigger sections, but start small. The section glued about is about two inches. 

THE most important step: Apply glitter right away! Don't let the glue dry. This is why I suggest doing small sections at a time so you get even coverage on the entire area you want it! The glitter should cover all of the glue, so don't worry about drying time between sections

I started doing a little bit bigger sections, but not by much. 

Repeat the above steps until the area you want covered is finished! 

Then you'll end up with super sexy booties like these! ;) So perfect for fall, can't wait to wear them out! 

If any of ladies attempt these, make sure to show me! I'll feature you on this here blog of mine :) Happy DIY-ing!


Xo


Wednesday, July 18, 2012

DIY Hubby shorts!

I love wearing my mans clothes.... especially when we're apart, it's something that makes me feel hmm.... connected to him? Maybe that's weird, or maybe you're like me and love wearing your hubbys/boyfriends clothes! 
Here's how to make 'hubby/boyfriend shorts!' 

Here's beforehand.... now this is probably potentially the trickiest part for some of you. Blake wears a size 32 jeans, and they're big in the waist on me, but the perfect amount bagginess I was hoping for. The boyfriend effect ;) I've just been belting them when I wear them, I haven't taken them in or anything. If your hubs/bf's jeans are terrible huge on you in the waist, I would suggest getting them taken in, or doing it yourself. Anyways, now for the fun stuff.....

Any jeans will do. These are just some super old ones Blake had from Buckle. 

I actually tried them on and measured where I wanted them to hit when they are rolled up {see first picture}. I then measured about 3 inches down from that point and drew a line so I could measure when I actually cut the jeans. 

Cut off where you drew your line, this doesn't have to be totally perfect, as you're going to end up rolling them up.

I actually just folded the jeans in half and cut straight across again on the other leg. If this is how you want your shorts to be, roll up the ends and you're DONE! Isn't that crazy simple?! My shorts stay rolled up pretty well just by themselves, but if you want you could actually sew the inner roll onto the jeans themselves. Personally I like them better just like this.... guys would never put that much effort into their jeans ;) 

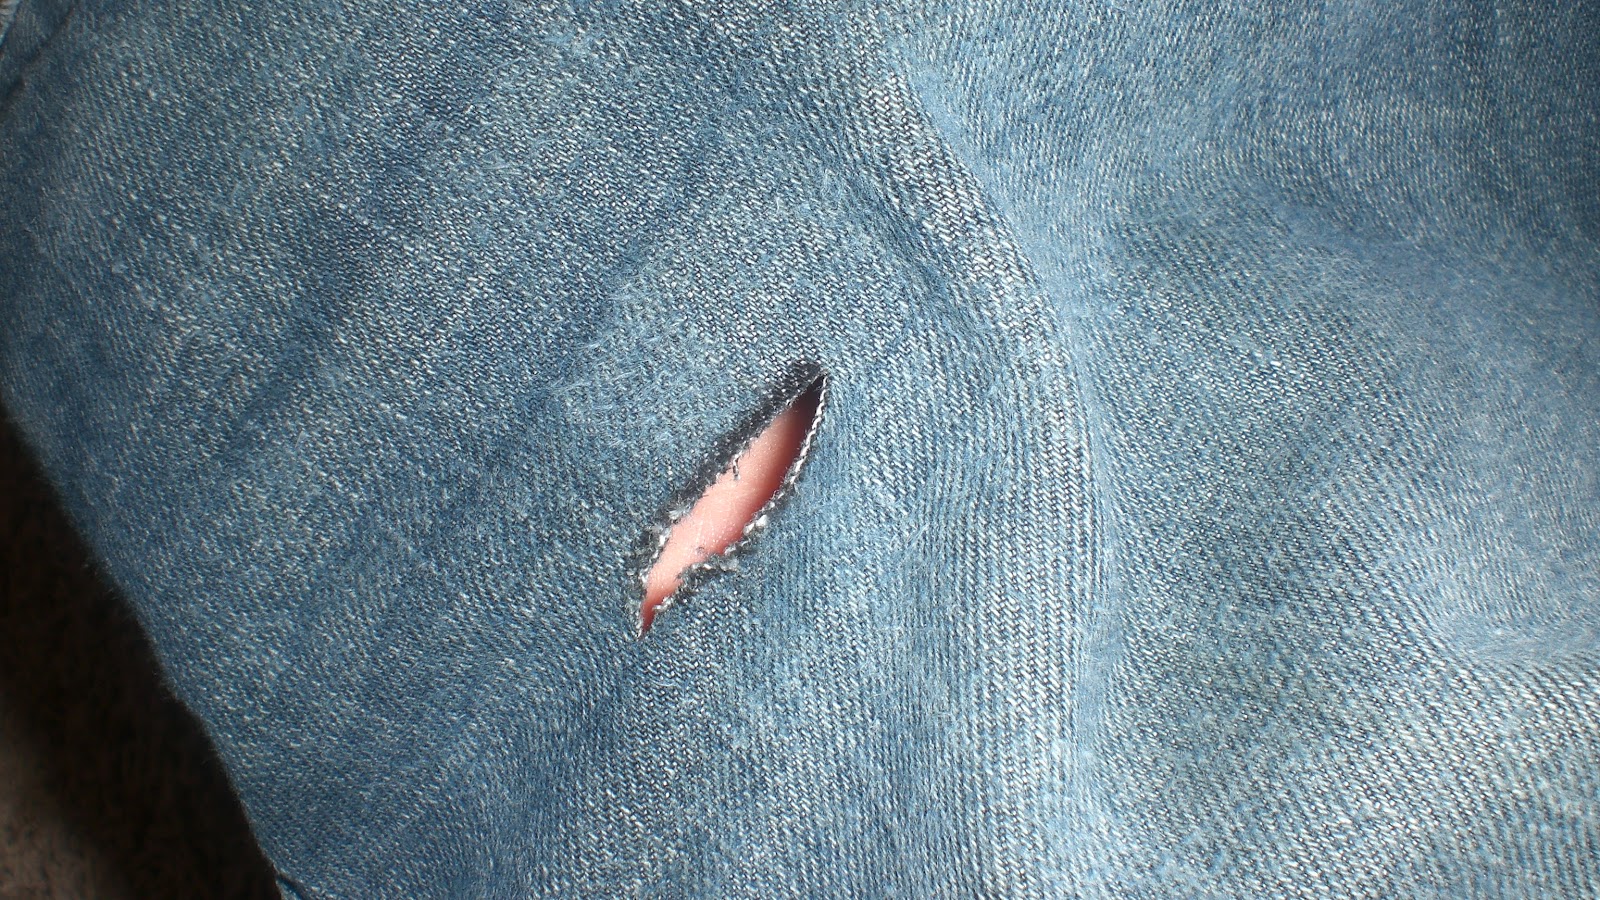
I decided that I wanted mine a little more 'destroyed'. I marked again with a pen where I wanted my holes to go. 

Cut along the line so you have a slit. You can make the hole wider, fray it by pulling out the seams that stick out, and randomly snip along the edges of the hole to help it create a more 'natural' looking rip. It just all depends on how polished/destroyed you want these to look! That's the fun part about DIY project, the outcome of how they look is totally up to you!

Hope you all enjoyed!! If you attempt these, I would love to see pictures!! :) Send me the link, post on Instagram and let me know, or you can email me! 

PS. If you read my blog, I would love you to follow it ;) 
You can also follow me on Instagram @Lexiphebs for sneak peaks of outfits/posts! 

Happy Wednesday!


.....


Tuesday, July 17, 2012

I love my hubby because.....

He's supportive, caring, loving, selfless, always puts me first, compassionate, he's my best friend, we're silly, he always keeps me laughing, his smile seriously lights up my worst days, his athleticism, and not to mention hes quite hot if I do say so myself ;) and he gives me his pants....... 

So I could make these!! 


 Wanna see what I'm laughing at in this picture? 
This would be Emmie, wishing she could be in the front with us taking pictures and chasing rabbits. 

Awk. 


Boyfriend shorts: DIY hubbies {Similar here if you're not into the whole DIY thing} | Cardigan: Macy's {Old, similar here} | T-shirt: Target {My FAV!!} | Sandals: Target | Bag: Tory Burch | Sunnies: H&M {Recent} | Necklace: Charlotte Russe 

I may or may not be totally in love with these shorts. As of late, 'boyfriend-style' everything has been my go-to pieces. I'm trying to be as stress-free as possible with the move coming up {7 weeks!} and I feel that it's reflecting on my outfits as well! I wore this to a street fair with one of my girlfriends Saturday morning and it was perfect; comfy and kept me warm in the cool morning temperatures! One important guideline I like to follow is that when wearing these menswear pieces, it's important to add some girly accents no matter how casual you're going! Leopard sandals and a funky, glitzy necklace are sometimes all you need ;) 


Check back tomorrow as I'll be posting my own DIY guide on how to make your own hubby/boyfriend shorts! 

Happy Tuesday!! 

.....

Thursday, July 12, 2012

Neons, Neutrals, and Nails

Here's another mini DIY tutorial for you guys! If you follow me on Instagram {@Lexiphebs} I posted these last night: 

I used Essie 'Sand Tropez' as my base coat {neutral}, and Sinful Colors 'Hazard' {neon}. 

If you want the diagonal tip, I just used a piece of tape to create a line. You want to make sure your base coat is completely dry, or else it will pull off some of the paint! In the picture about, you can see how the line is a little jagged. My right hand turned out much better ;) 

While waiting for the stripe/tip/whatever to dry, I used a toothpick to draw random cheetah print shapes on my finger. These do not have to be perfect people! 

I used an Art Deco black nail polish {the teeny, tiny brushes} to paint around my splotches. Once again, this is not perfection. That's what makes it easy fun! Yes, my finger was still tapped! 

Here's the other hand without the tip yet! Nails are just so fun for me so I thought I'd share my latest ;) 
I'll be back next week guys! Sorry for the lame posting week, I am super stressed and totally drained. I've had 11 hour days at work {except yesterday I had the day off miraculously} and doing a full post just honestly seems daunting to me! I did have some luck in the furniture game, I'll share some finds next week. Can't wait to share, I have lots planned for next week so hopefully it will make up for this week ;) I'm gonna take the weekend to relax and live mostly stress free so I'll see y'all Monday! 

Have a happy happy weekend :) Enjoy!


.....


Wednesday, July 11, 2012

DIY Neon Statement Necklace!

If you're like me, you've seen tons of gorgeous neon jewelry pieces, but sometimes they aren't necessarily in your budget. This necklace via Bauble Bar is totally gorgeous.... 

But $300 is way out of my price range. As a college student always on a budget, I thought I could come up with something similar for a lot less! Here's how: 

I picked this necklace up for $5 at Charlotte Russe. They don't have a ton of jewelry online, but in stores all jewelry is $5!! Check out some local thrift stores, or options: 1|2

I bought some neon-yellow nail polish from Icing {about $4} but any brand will do. Because the pieces on this necklace are not clear, but have a taupe-tinge to them, I painted about 12 coats on. That seems like a lot, but it really depends on what necklace you pick up! Make sure the coats dry before painting another one, or you'll have funny globs or weird lines! I'm sure it would take less coats if the stones you're painting on are clear. 

Make sure to let it dry overnight! If you do more than a few coats it's best to give it ample time to dry. I took this picture at night so it doesn't appear as bright, but it's for sure a statement! 

And voila! This was a super easy project, and fun to do! If you have a little time and want your own fun statement piece, definitely try this out! It would be fun to experiment with different colors too I think! If any of you make one, let me know how it turns out. I'd love to see pictures!

Happy crafting and happy Wednesday!

.....